This section provides all the information you need to set up the portal and an overview of the most important features.
This is the virtual multi-page printable view of this section. Click here to print.
Documentation: For Users
Everything you need to know about the checking of incoming documents
Please note that downloading this page as a PDF creates a static document. Any changes to the content presented cannot be included in the PDF later. We therefore advise to always use the version available online.
1 OC-Creation
Learn how to enter an order confirmation manually
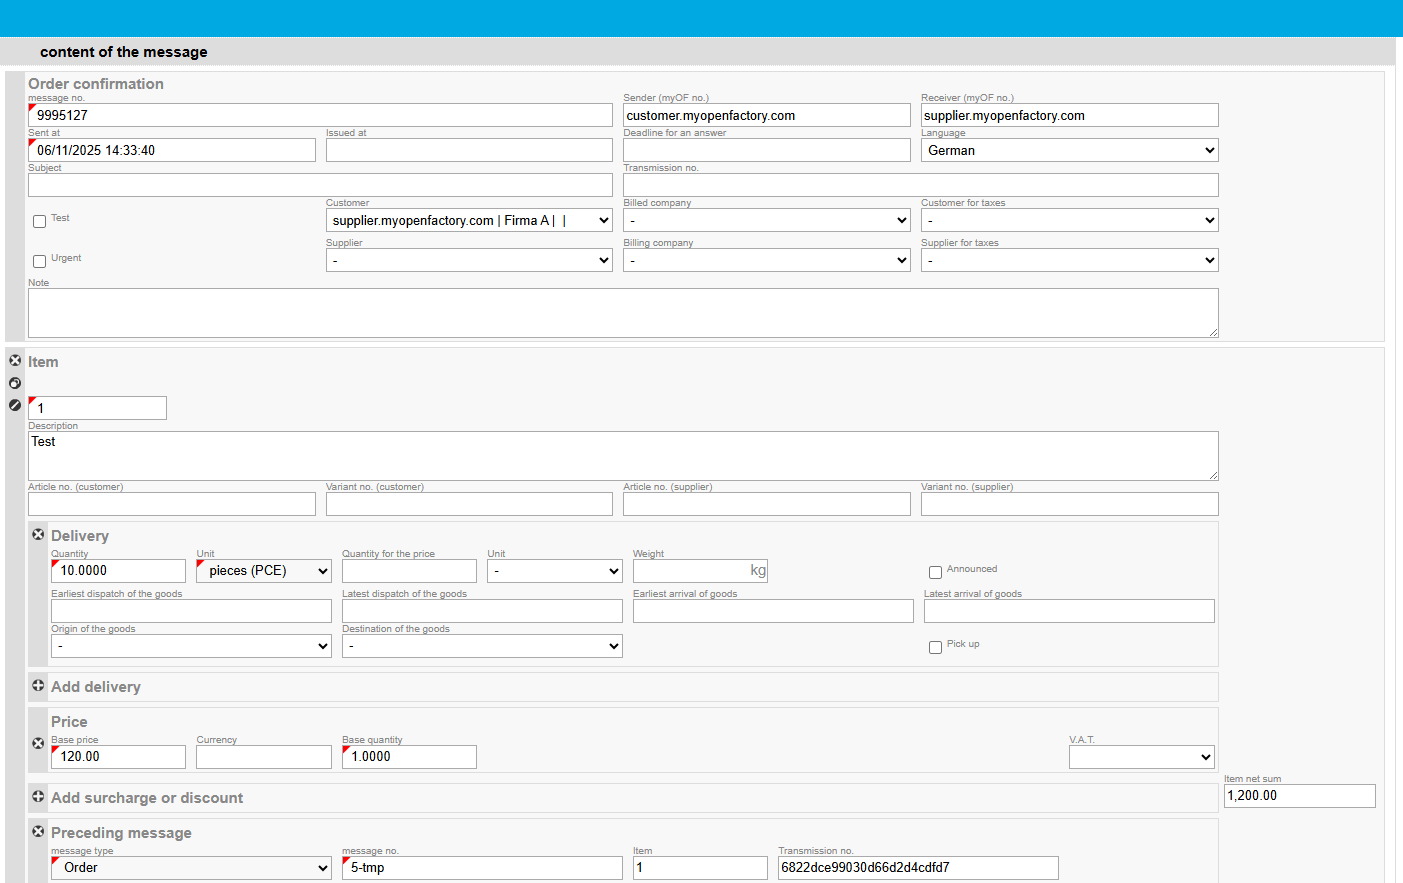
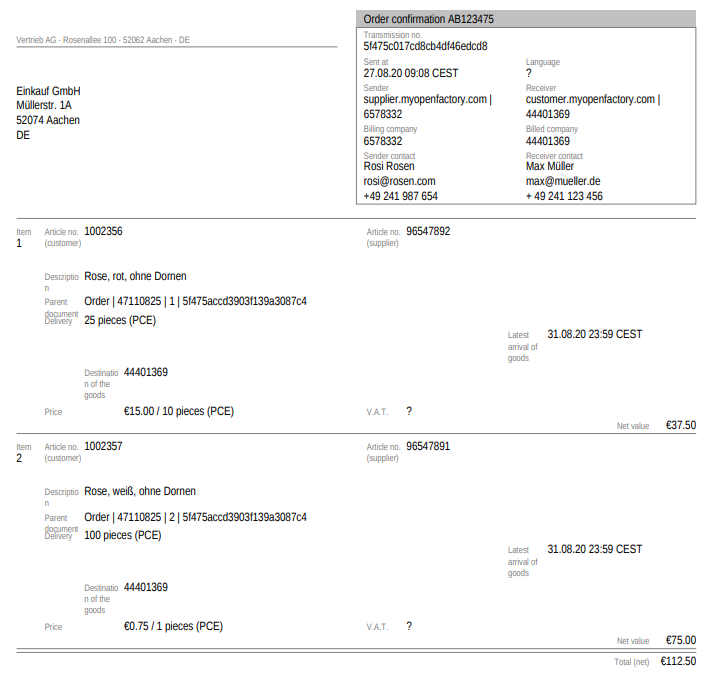
Create order confirmation
- Open the purchase order for which you want to create an order confirmation
- Click on the “Answer” button in the top right corner, in the blue bar

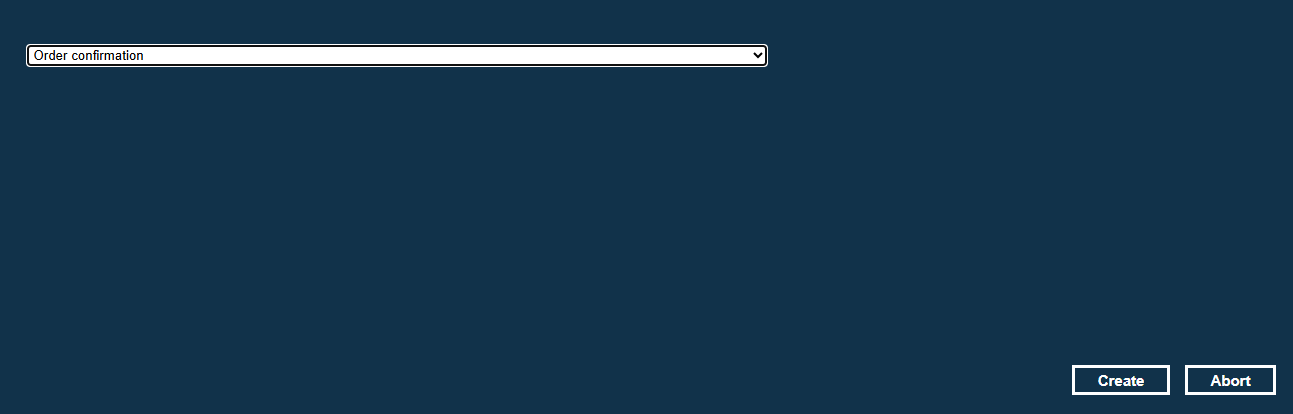
- A pop-up opens, where you can select the document type that you want to use. When answering an order, only the order confirmation is offered
- Click on the “Create”-button
- The draft order confirmation will open
- This is already pre-filled with all information from the order
Confirm the order in its entirety
If you do not want to make any changes to the order in the order confirmation, please follow these steps:
- Click on the “Send”-button in the top right corner, in the blue bar

- A message appears that the document has been successfully sent

- Confirm by clicking on “OK”
Confirm orders with changes
If you want to make changes in quantity, delivery date or price, please proceed as follows:
Adjust quantity
- Go to the “Delivery” section

- In the “Quantity” field, you can now enter the desired quantity

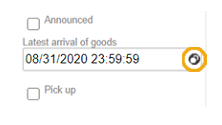
Adjust delivery date
- Go to the “Delivery” section
- Click on the delivery date
- A calendar opens
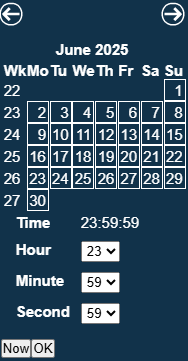
- Select the desired date in the calendar and confirm it with a click on “OK”. By clicking on “Now” you always jump to the current date.
Adjust price
- Go to the “Price” section

- Click in the “Base price” field
- Enter the new price (with comma as decimal separator)

If you have changed the price, the net value (right) is automatically adjusted.
Tips for processing of documents can be found here.
2 OC-Check
Learn how to check an order confirmation
Opening order confirmations to be checked
Depending on the user setting, you will be notified by e-mail of each document that has been paused for review. The link contained in the e-mail takes you to the document view of the order confirmation.
Alternatively, you can open the order confirmation via your inbox. You can identify order confirmations to be checked by the “Awaiting decision” status.
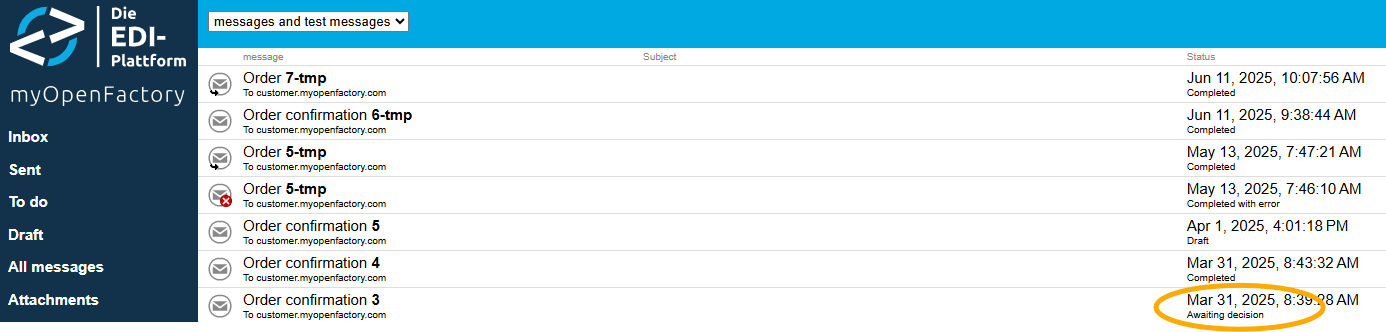
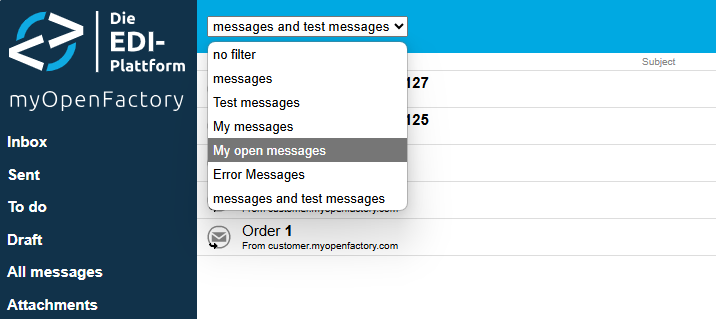
You can also set the document filter to “My open messages” to display only documents to be checked.
Types of deviations
There are two types of marked variances in the portal:
- relevant deviations (colorcode: orange)
- non-relevant deviations (colorcode: yellow)
Relevant Deviations are any deviations that fall outside the tolerance range that you defined in the portal.
non-relevant deviations are those that are within the tolerance range, or any other deviations that could still be detected by the platform.
Documents are only held for review if at least one relevant deviation has been detected. Documents with only non-relevant variances are not stopped, but the variances are still marked yellow in the documents.
The deviations
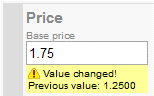
At first glance, you can see a relevant deviation (orange) in the folded position. Next to the current value, the value from the purchase order is displayed. In addition, you can recognize existing deviations by using the exclamation point on the left side of the line item box.

Here: Value changed! Previous value: 21.07.19
The line-item number, item description, delivery date, and price are displayed in the collapsed line. A deviation that refers to other values within the position is indicated with an orange marker on the left side of the position.

Then click the position to see the relevant deviation.
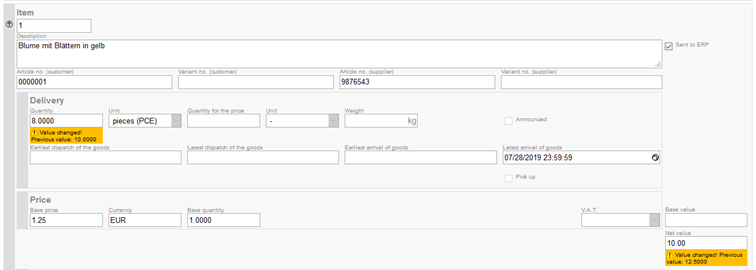
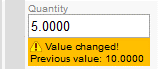
In addition to the price variance, there is a quantity variance (previous value 10 pieces, now 8 pieces), or the price deviation results from the quantity deviation.

The same applies to non-relevant deviations, whereby the color of the marking here is yellow. If both relevant and non-relevant deviations are present, the marking is colored orange.
Accept and Reject
Accept
If you agree to the order confirmation despite deviations, you can accept the order confirmation. To do this, click on the “Accept” button in the upper right corner.

A message appears that the document has been saved successfully.

Click OK to return to your inbox. The document is sent to your ERP system with the deviations.
Reject
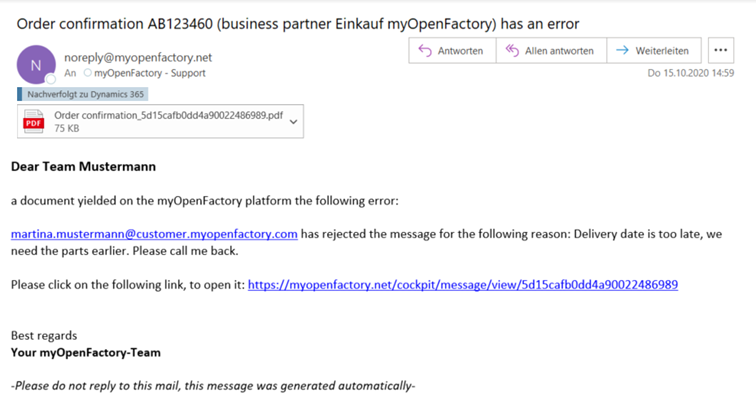
If you do not agree with the order confirmation due to the deviations, you can refuse the order confirmation. To do this, click “Reject” in the upper right corner.

A mask appears in which you can enter the reason for the rejection.

Then click on “Reject”, your message will be saved and (if desired) forwarded to the responsible reviewer at the supplier. The message then changes its status to “Completed with error and warning” and is marked with a red X. The message will not be sent to your ERP system.

If you reopen the order confirmation, the reason for the rejection will appear at the top of the message.

3 More Features and Tips
Helpful information and functions for creating and processing documents
Download PDF
If you would like to download a PDF of a document, you can easily do so from the document view. Simply click the printer icon in the upper-right corner.

In the next window, you can choose whether to hide features and attachments. We recommend keeping the default settings (hide features).

Depending on your browser, the PDF will either open in a new tab or be downloaded directly.
Tips for Processing Documents
Deleting Line Items
You can delete line items by clicking the X icon on the left side.

Duplicating Line Items
To simplify the creation of new line items, you can duplicate an existing one. Click the circle icon on the left side to do this.
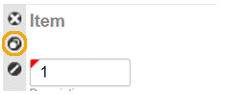
A new line item will appear, with the item number automatically incremented.
Cancelling Line Items
If you are unable or unwilling to deliver a specific article, you can cancel the line item. We recommend using the portal’s built-in function for this. To do so, click the slash icon.
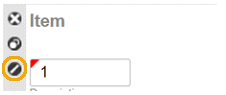
Deleting a line item to avoid confirmation is not recommended, as the customer won’t know why the item was removed and may still expect confirmation. Clicking the slash icon sets the confirmed quantity to zero, clearly indicating that the line item has been cancelled.
Copying a Delivery Date to All Line Items
If you want to change the delivery date in an order confirmation, you can apply the new date to all line items at once. First, change the date in the first line item, then click the circle icon to the right of the delivery date. The date will be copied to all other line items.
Adding Surcharges and Discounts
You can add a surcharge or discount by clicking “Add surcharge or discount” (located just below the price). Then enter the description, type, and percentage.
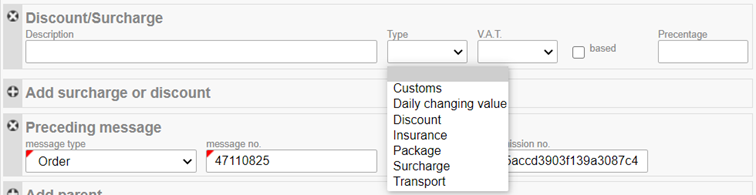
Adding Payment Terms
Click “Add Condition” to add payment terms. Please note that this should be agreed upon in advance with your customer. You will need to specify the description, number of days, and percentage.

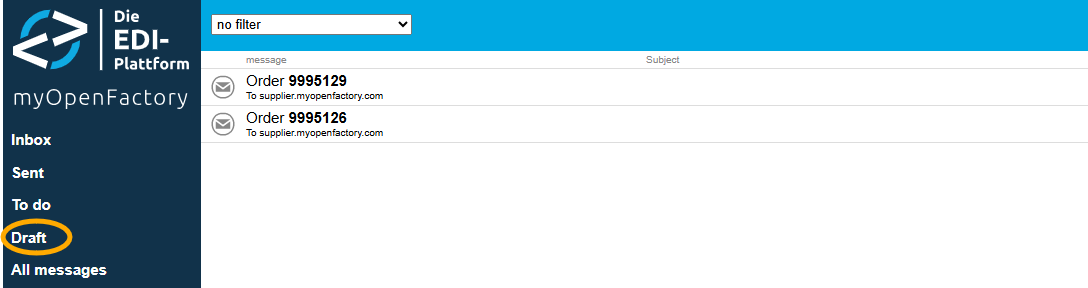
Saving Drafts
If you’ve started editing an order confirmation but are not ready to send it, you can save it as a draft. Click “Save” in the upper-right corner.

A message will confirm that the document has been saved. You can find it under “Drafts” in your folders and continue editing it at any time.
Cancelling Drafts
To cancel a draft, click the “Abort” button in the top-right corner.
