This section provides all the information you need to set up the portal, as well as an overview of the key features.
This is the virtual multi-page printable view of this section. Click here to print.

Documentation: First steps
Please note that downloading this page as a PDF creates a static document. Any changes to the content presented cannot be included in the PDF later. We therefore advise to always use the version available online.
1 Login-Credentials
Username and password
When your company-account is created in the portal, you will be the first user to automatically receive a welcome-email with your personal username and password. The email looks something like this:
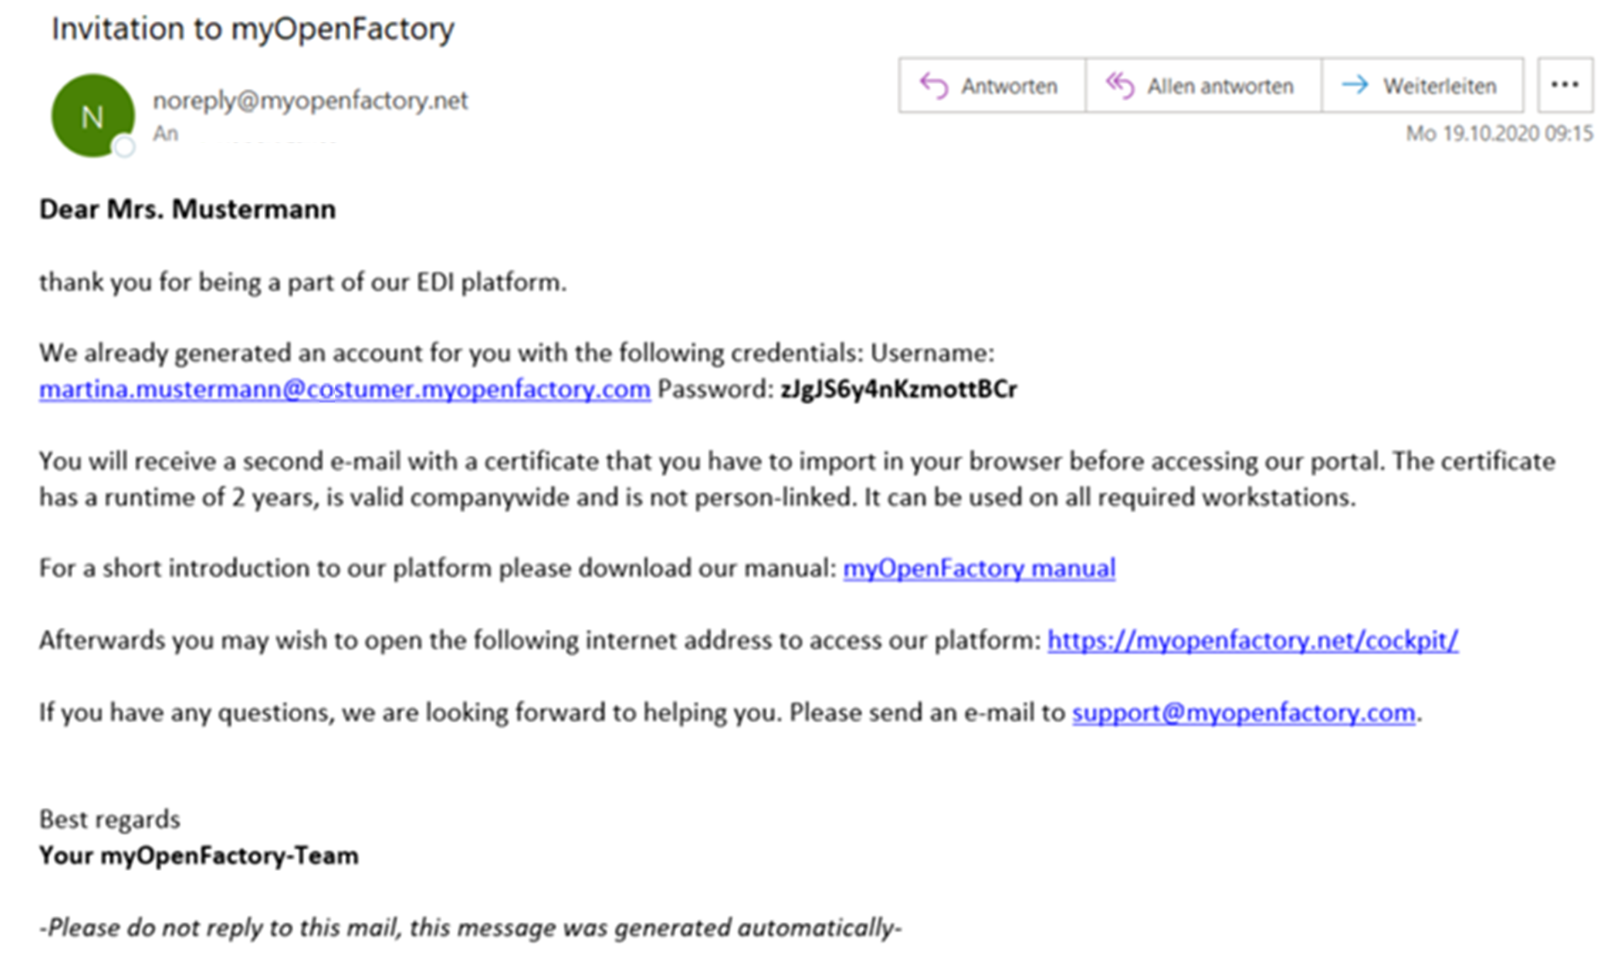
You will find your username and the provisional password, as well as a direct link to the portal. You can change the provisional password in your user profile.
2 Certificate
In addition to the welcome email, you will receive an email with a certificate including a password. The email looks something like this:
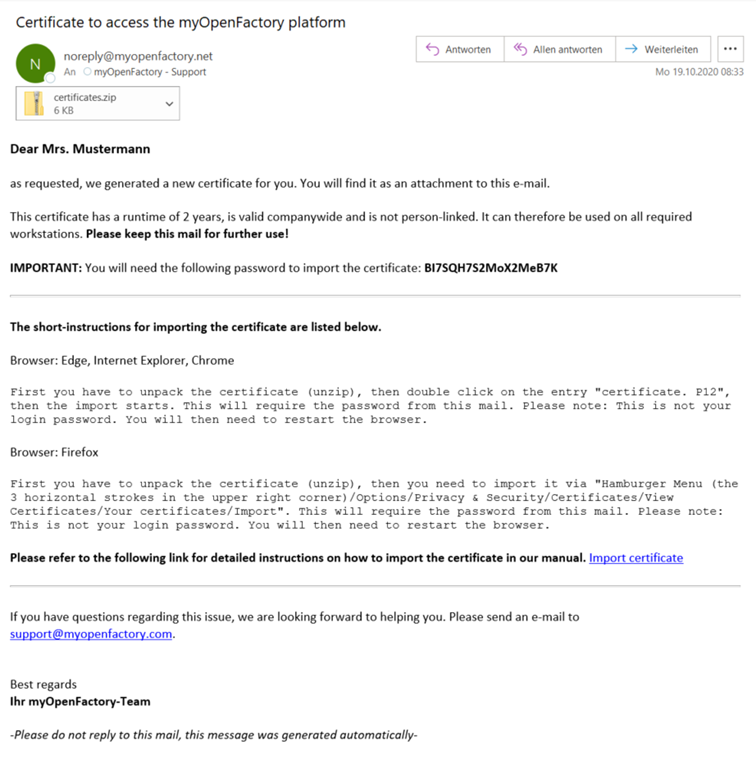
In the attachment to the email, you will find the certificates.zip, file that contains the certificate for your company. The body of the e-mail also contains the certificate password that you need to set up the certificate. We therefore recommend that you keep the e-mail secure or store it in your organization in a way that all users have access to the certificate including password at all times.
Later in the email, there is instructions on how to import the certificate, depending on your browser. You can find the instructions at Import of the certificate.
If you have not received the email, please contact our Support.
Import of the certificate
Internet Explorer, Microsoft Edge, Google Chrome
- Download the certificate from the email and save it locally to your computer
- Unzip the .zip file (Windows10 ‘Extract All’ or WinZip/WinRar/7zip or similar)
- Open the certificate.p12 file and the “Certificate Import Wizard” will start

- Click on “Next” and again on “Next”
- Now enter the password from the certificate mail in the “Password” field
- Confirm with “Next”
- The certificate store of Windows is automatically suggested, again confirm with “Next”
- Click on “Finish”
- A message appears that the import process is complete
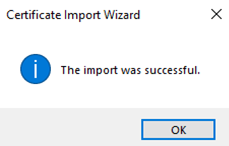
- Close and restart your browser for the change to take effect
Mozilla Firefox
- Download the certificate from the email and save it locally to your computer
- Unzip the .zip file (Windows10 ‘Extract All’ or WinZip/WinRar/7zip or similar)
- In Firefox, click on the Hamburger button (3 horizontal strokes)
- Click Settings
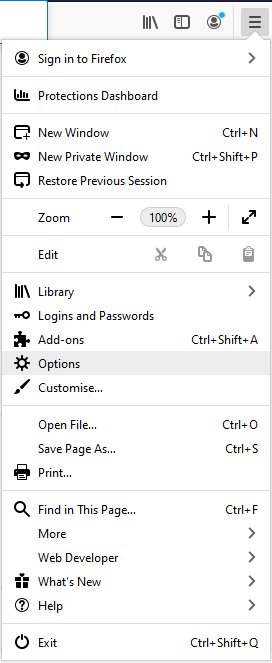
- Select the menu item “Privacy & Security” on the left side of the list
- Scroll to the bottom to “Certificates”

- Click “View Certificates” and a new Certificate Management window opens
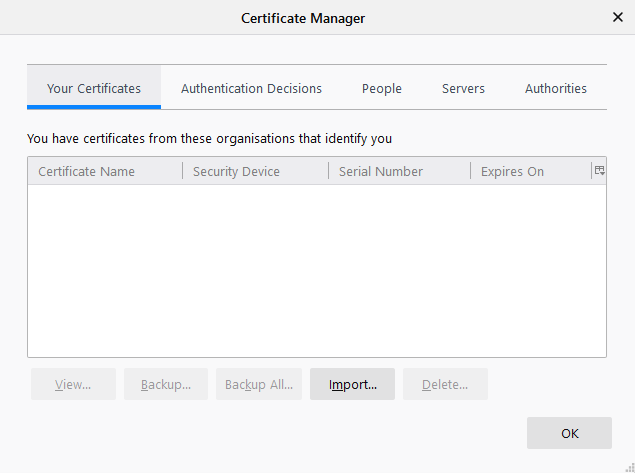
- In this window at the bottom, click “Import…”
- Then select the unzipped
certificates.p12file and confirm with “Open” - Now enter the certificate password from the email
- The certificate now appears in the list under “Your certificates”
- Close and restart your browser for the change to take effect
After importing the certificate, you can log in to the portal.
Login problems
If you have problems logging in, we recommend our myOpenFactory certificates help page. Troubleshooting certificates
3 Login
The Portal
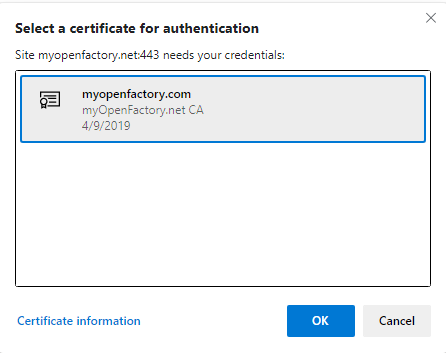
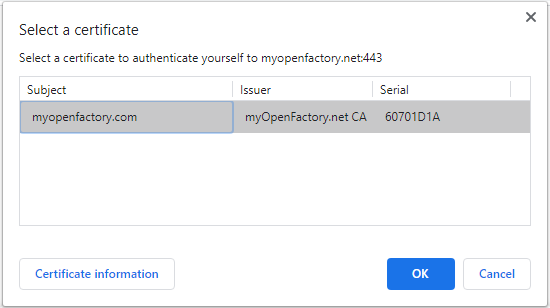
You can reach the portal at any time via https://myopenfactory.net/. Before the website is accessed, most browsers ask which certificate to use for authentication. Select the appropriate certificate (if multiple certificates are displayed) and confirm the selection.
Exampel from Microsoft Edge:
Exampel from Google Chrome:
Exampel from Mozilla Firefox:
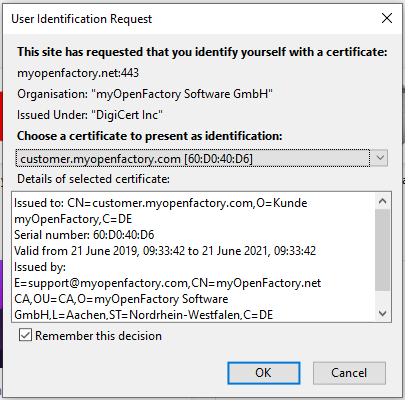
You recognize the correct certificate by the fact that it is always issued by “myopenfactory.net”. The applicant or subject is usually your company domain (as in the example “myopenfactory.com”).
The Login screen

Please enter your personal username and password from the Welcome-Mail here and click on “Log in”. You will be taken to the portal and your inbox is displayed.
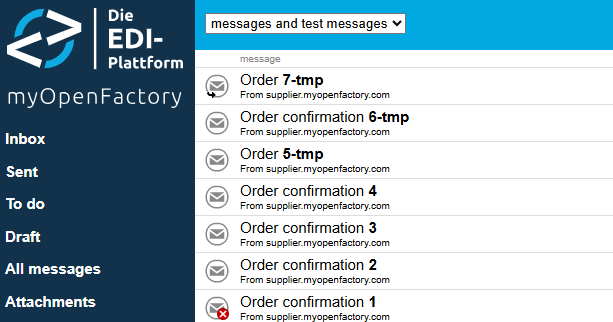
4 Mailboxes
Inbox

In your inbox, you will always see all EDI-documents that have arrived at you. Provided you have not adjusted the filter to view the documents. For more information about the filters, see Filters for mailboxes.
If you are purchasing via the platform, you will find all the answer documents of your suppliers here. For example, order confirmations, despatch advices and invoices. If you use the platform for your sales, you will see the orders or your customers’ quotations in your inbox.
Sent
Among the messages you send are all EDI documents that you, as a company, have sent to the platform. As a purchasing company, therefore, all orders, as a selling company, the answer documents such as order confirmation, delivery notification or invoices.
Draft (Web-EDI only)
Here you can find all documents that you have already created as a draft but have not yet submitted. If you have an ERP connection to the myOpenFactory platform, you do not create documents manually and do not need this menu item.
All messages
View all documents from the Inbox and Sent together.
Icons
In the mailboxes, you may see the following icons to the far left of the listed messages:
| Icon | Meaning |
|---|---|
 | The message was successfully processed. |
 | The message produced an error during processing or was rejected by the recipient. |
 | The message has been answered or continued. For example, an order with an order confirmation or a change order to an order. |
 | The message has a test indicator or was sent as a test message. |
5 Document-view
If you want to open a document in your Inbox or in Sent, just click it.
Navigation

In the navigation you will find all documents that are related to this document. The chain of the documents, including the document number and the date of the documents, is displayed. Documents from the chain can be displayed in the navigation before or after the document shown. Clicking on a document in the navigation opens this document for viewing.
Header details

Here you can find:
- Messaage-number
- Sender and recipient
- Date
- Transmission number
- Customer and supplier (automatically filled)
Line items
Line item-overview

Here you can find:
- Line-item number
- Article description
- Delivery date
- Net amount
All line-item information
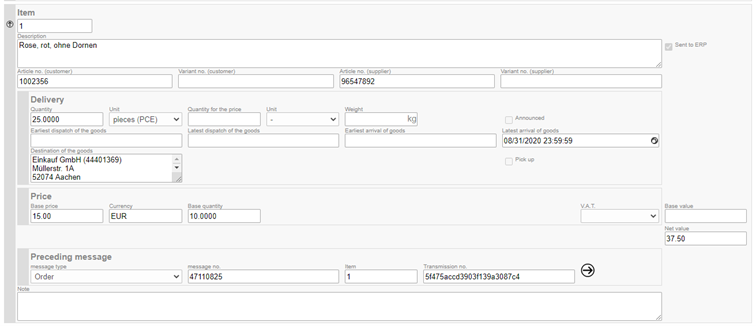
By clicking on a line item, it can be opened.
Here you can find:
- Article numbers
- Quantity, unit of measure
- Consignors and receivers
- Price
- Currency
- Base quantity
- If applicable, predecessor document

Documents that relate to other documents also have the “Preceding message” field at item level. The document type, the document number, the reference line and the delivery number are displayed here. The delivery number is a unique number that is automatically assigned by the platform and distinguishes the document from others. It is possible that a document has more predecessors. For example, an invoice can be referenced as a previous document, a purchase order, order confirmation and a delivery notification.
Total

View the total amount of the document.
Companies

View all companies that appear as roles in the document. These are usually the customer and supplier, a goods recipient and/or invoice recipient.
Status

The status shows the technical delivery status. It does not specify the processing status of the document at the receiver´s side.
Internal Message (for Admins only)
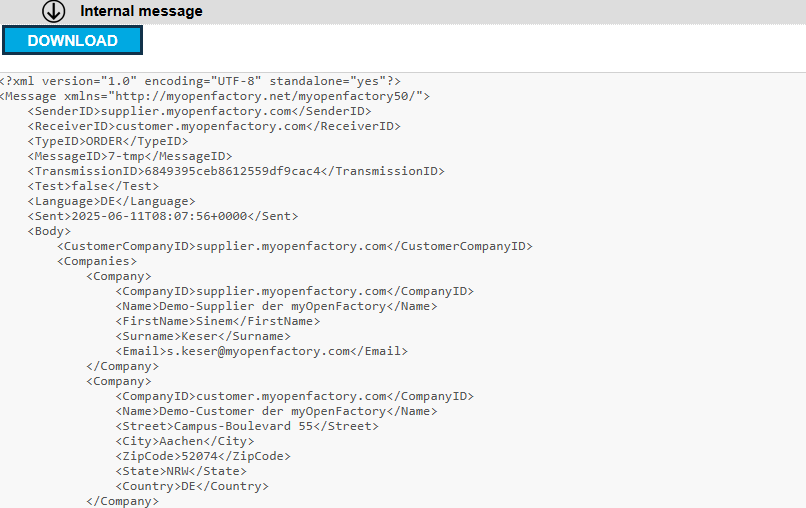
The internal document is the format of the myOpenFactory, into which all documents are translated. From the internal document, the document is translated into the recipient’s format. It has no relevance for most users.
6 Search bar
You can use the search function at the top right to find the messages you want in every mailbox.

What to look for
- specific message number/ID
- company name of a business partner
- name of a responsible contact
- message type
- e.g. ORDERS, CHANGEORDER, ORDERCONFIRMATION, DISPATCHNOTIFICATION, INVOICE, CREDITMEMO
The search interval
The search interval next to the search bar enables you to limit the search to a certain period. For example, if you only want to display messages from a specific business partner from the last 3 months, you can set up the interval accordingly.
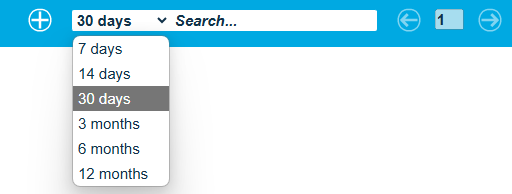
The following intervals are available:
- 7 days
- 14 days
- 30 days
- 3 months
- 6 months
- 12 months
The default search interval is set to 30 days for all users. You can change the default interval at any time in your personal profile in the view settings.